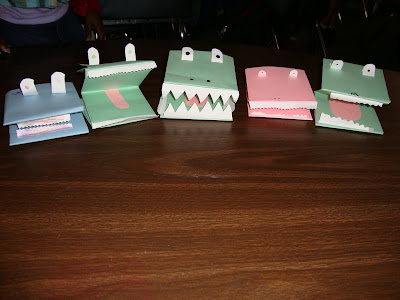
Today's QUICK AND EASY ART ~ Gator Puppets!
This is perfect for the End of the School Year or for a Summer Camp. Once you teach the children how to make the basic body of the puppet, they can make it in a variety of color for different animals.
Step By Step Photo Directions with My Pudgie, Little Hands
Step By Step Photo Directions with My Pudgie, Little Hands
Materials:
12 X 18 piece of green construction paper
12 X 9 piece of white construction paper
Scissors
Glue
Crayons or Makers for details if desired
Scraps of other colored construction paper
Directions:
12 X 18 piece of green construction paper
12 X 9 piece of white construction paper
Scissors
Glue
Crayons or Makers for details if desired
Scraps of other colored construction paper
Directions:
1. Fold the basic puppet share {directions here}
2. Let the students cut out 2 white "house shapes" with a rounded roof. Fold the bottom a little bit and when you glue it down on the fold, it makes easy-cheesy 3-D eyes!
3. Using scrapbooking scissors, or drawing triangular shapes, cut out two rows of white teeth. Glue on the inside of the mouth part. {See picture.}
4. If you have a scrapbox of leftover construction paper in your classroom, it is fun to let them use that and markers to add extra details. Bow ties, hair bows, tongues, etc.
ENJOY!
-->
Link Up Time ~ What would you like to share?


No comments